Wednesday, 8 April 2015

Easter Activity

Spring is definitely in the air, the days are longer, there is the sweet smell of crocuses and daffodils on the breeze and we've had the first few warm sunny days here on the Wirral. The Easter weekend saw the house packed with the family, giving me the opportunity to indulge in a spot of baking, a pastime I love but don't do as often, now the children have all grown up and our waistlines need no further expansion! My chocolate Guinness cake is a firm family favourite and my chicken and ham pie went down a treat.

The brighter weather has inspired me to bring some colour into my creative projects. I've chosen these pretty chalky colours for the 'v' stitch blanket I'm working on in the evenings. Every new row brings a smile to my face as this bright little blanket emerges. Perfect for a little girl I think!


I'm definitely an all or nothing person. I can be fired up and full of creativity, my hands struggling to keep up with all the ideas whizzing round my brain. Then after a while I run out of steam and can't seem to get the motivation to make anything. I find these periods very frustrating especially when they coincide with holidays and I have time to spare. Eventually inspiration comes, often after browsing on Pinterest or talking with likeminded friends. The cogs start to turn again and I'm off!

I've had these striking retro print fat quarters in my stash for a while and decided to make them into a messenger bag swapping my usual heart appliqué for a 70s cosmic design! This bag shape is another favourite of mine as its so versatile. Its practical to use and the design has lots of scope for your own interpretation. I'm currently working on a tutorial so watch this space!


A couple of people who I sit with for lunch at work asked me for a lunch bag with a drawstring lining. I found this great tutorial for just the thing at Pink Penguin So far I've tried it out in these bright polka dots (anyone who knows me, knows about me and polka dots!!).


Today I found these fabrics in my local fabric shop while stocking up on bits and bobs. The green / blue combo and the Cath Kidston inspired heavier weight cotton will be great for these little lunch bags.


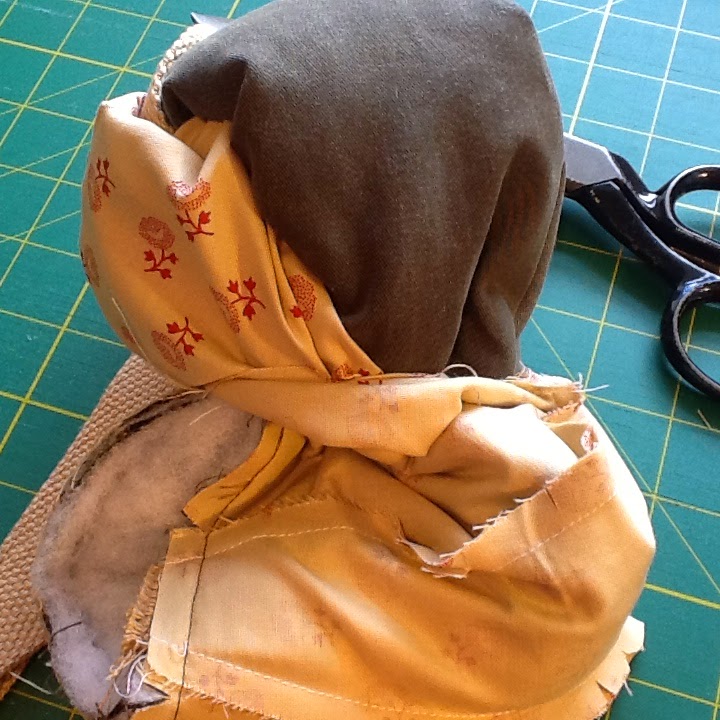
A while ago I was asked by a friend if I made tea cosies. I finally got round to trying one out. I found this lovely fabric with tea pots on it and thought it most appropriate!


The last thing to show from my latest making frenzy is this pretty set. The cube bag is a regular repeat but I haven't done a matching drawstring bag for a while.


Well This Easter break has been busy so far, I will hopefully be in touch soon with a new tutorial and some more of my makes.

xxx

Tuesday, 3 March 2015

Book Review

The internet is a fantastic resource for design inspiration and I particularly love Pinterest. A day rarely goes by without me checking to see what new ideas are out there and saving them to inspire my own projects.

That said you can't beat a good craft book, packed full of beautiful colour images and imaginative projects. I've had this book A Passion for Patchwork for a while, it is well-used and full of my scribbles as I have taken and adapted many of its ideas to suit my own style.


Here are just a few of the things I have made using inspiration form this lovely book.


I thought the combination of these pretty hearts and stripes on this tea cosy would work well on some quilted place mats. I have made these mats several times now and each set has sold straight away. I think the actual tea cosy might be one to make soon as I have had a couple of enquiries. I love a cup of tea and proper tea from a pot has definitely come back into fashion! I must get cracking on some cosies soon!


I knew I had to make these cute little purses as soon as I saw them. They are so unusual and fun to make. I love choosing pretty fabrics that go together and they only need scraps. The best bit is when you turn the finished purse to its right side and it suddenly becomes three dimensional.


I have adapted this little draw string bag and it goes really well with the cube purse above to make a pretty matching set. I have made lots of these in all sorts of colours and sizes. I can make a whole set of matching purses from three or four co-ordinating fat quarters.


As well as small projects like the purses and the tea cosy, the book also has quite a few quilts of different styles. I particularly liked this chequer board design and thought it would work well for a jelly roll of batik fabrics I'd had for a while. I didn't use quilt batting for this one but lined it with a bright orange fleece fabric which along with the black border, brings out the bright colours in the fabrics.


I hope you have enjoyed my review of what is definitely my favourite and most used craft book.  Books can be so expensive so it's great to have a recommendation so you are sure you will get lots of use from it. I would love to hear about your favourite book whether it is about patchwork, sewing, crochet or any other craft. Please do leave a comment.

I look forward to investigating some new books and possibly learning some new crafts.

Sunday, 1 March 2015

Signature Shoulder Bag Tutorial

This is my most popular bag design, I make it in three sizes. I often use suiting samples from old tailors swatch books that I found gathering dust in a cupboard or upcycle old jeans. The smallest is rather fiddly but it's the one I wear every day around school as it's just big enough to hold my phone, keys and a board maker! I recommend you start out making the medium or large bag first.


You can download a PDF of the pattern HERE

(Remember to set the size to 100% when you print it out)

To make this bag you will need:


Fabric or off-cuts for the outside of the bag (depending on your design)
Lightweight cotton fabric for the lining
Wadding
Iron-on interfacing to stiffen the flap
Cotton webbing or similar for the strap
A button

Instructions for making


1. Cut the bag pieces out and back with wadding. You need to add any decoration to the cut pieces now. I use a combination of patchwork and appliqué. I make the flap by sewing strips of contrasting fabrics together and quilting before cutting out using the pattern piece. Add a button loop facing inwards as shown (make the button loop from a strip of fabric approx 4 cm wide turning the long edges in before folding in half and machining together).


2. Iron interfacing on to the back of the piece that will become the back of the flap. I always draw in the stitching line on the interfacing and cut away most of the seam allowance, reducing the thickness and making it easier to stitch a neat symmetrical curve.

Now sew the flap and its backing together, right sides facing, leaving the top edge open (1 cm seam allowance). Trim and clip curves before turning through to the right side and topstitching to give a flat edge.


3. Stitch the top of the finished flap to the back of the bag body piece (the outside of the flap facing the right side of the bag piece).


4. Now stitch the bag front and back pieces to the side panel right sides together (1 cm seam allowance) around the curved edges. you might need to snip into the seam allowance along the edges of the side panel so that it fits smoothly around the curve. 


5. Stitch the ends of the strap to the top of the side panels as shown, so that the length of the strap is directed downwards into the right side of the bag.


6. Stitch together the lining pieces in the same way as the bag, but leave a gap along one of the bottom edges. You will turn the finished bag through this hole later.


7. Put the bag inside the lining, right sides together, matching the seams around the top edge. The flap and the strap should be hidden inside. Stitch right around this top edge 1 cm from the edge.


8. This is the clever bit! Turn the whole bag to the right side by pushing it through the hole you left in the bottom of the lining. Stitch up the gap folding the seam allowances inside.


9. Finally tuck the lining down into the inside of the bag and topstitch around the folded edge to keep it down and give a flat finish. You will need to stitch this quite slowly and carefully as you have a number of thicknesses to stitch through. Stitch a button on to the front of the bag to fasten the flap down.


Sunday, 15 February 2015

Rainbow Ripple Blanket

Its half term this week so hope to have some time in my sewing room planning, pondering, designing, making and generally having a lovely time!

Saturday started with a walk along the Dee estuary followed by some liquid refreshment in one of our favourite dog-friendly pubs, then home to the warm for a spot of relaxing crochet.


I've been wanting to try out this ripple pattern from Lucy at Attic 24 for some time, so I decided to use up all my odd part-balls to make a rainbow pattern. It might be a bit of an ongoing project that I keep coming back to if I run out of yarn or get bored!


Saturday, 14 February 2015

Pointed Petal Flower Tutorial

Here's my take on this pretty fabric flower.


Cut five circles of fabric. I've cut these petals 4 inches diameter.


Fold each petal into quarters.


Using double thread, work a running stitch along the raw edges joining all the petals together. The stitches don't need to be too small but must be even.


Pull up both ends of the tread as tightly as you can and knot securely together.


Attach a small circle of felt to the back of the flower with slip-stitches to cover the raw edges.


Stitch a button in the centre of the flower. I've layered two buttons together for a nicer effect. 
Tip: Fill the little hole in the centre of the flower, where you knotted it, with pinch of wadding to prevent the back of the flower being drawn up when you sew through the holes in the button.


Square Petal Flower Tutorial

There are lots of tutorials online for fabric flowers but I always end up changing them. Here's my take on this square petal flower.


Cut 5 squares of fabric 3 inches x 3 inches.


Turn the edges of each square into the middle and press. Fold the two ends together (don't press this fold).


Using double thread, work a running stitch joining all five petals, close to their raw edges. The stitches don't have to be too small but must be even.


Pull up the two ends of the thread and knot together tightly.


Stitch a button securely into the centre of the flower. I've layered two buttons together here for a two-colour effect.


Slip-stitch a small circle of felt on the back of the flower to hide the raw edges. you can now add a pin  or clasp to turn this pretty little flower into a broach or attach to a hair bobble. Or how about stitching a row of these around the neck of a jumper or t shirt?