

You can download a PDF of the pattern HERE
(Remember to set the size to 100% when you print it out)To make this bag you will need:
Lightweight cotton fabric for the lining
Wadding
Iron-on interfacing to stiffen the flap
Cotton webbing or similar for the strap
A button
Instructions for making
1. Cut the bag pieces out and back with wadding. You need to add any decoration to the cut pieces now. I use a combination of patchwork and appliqué. I make the flap by sewing strips of contrasting fabrics together and quilting before cutting out using the pattern piece. Add a button loop facing inwards as shown (make the button loop from a strip of fabric approx 4 cm wide turning the long edges in before folding in half and machining together).

2. Iron interfacing on to the back of the piece that will become the back of the flap. I always draw in the stitching line on the interfacing and cut away most of the seam allowance, reducing the thickness and making it easier to stitch a neat symmetrical curve.
Now sew the flap and its backing together, right sides facing, leaving the top edge open (1 cm seam allowance). Trim and clip curves before turning through to the right side and topstitching to give a flat edge.


3. Stitch the top of the finished flap to the back of the bag body piece (the outside of the flap facing the right side of the bag piece).

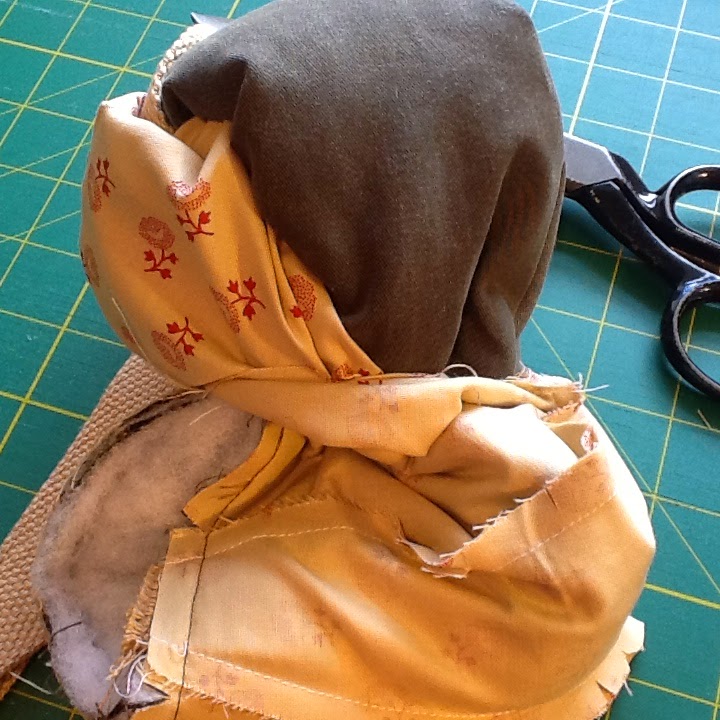
4. Now stitch the bag front and back pieces to the side panel right sides together (1 cm seam allowance) around the curved edges. you might need to snip into the seam allowance along the edges of the side panel so that it fits smoothly around the curve.

5. Stitch the ends of the strap to the top of the side panels as shown, so that the length of the strap is directed downwards into the right side of the bag.


6. Stitch together the lining pieces in the same way as the bag, but leave a gap along one of the bottom edges. You will turn the finished bag through this hole later.

7. Put the bag inside the lining, right sides together, matching the seams around the top edge. The flap and the strap should be hidden inside. Stitch right around this top edge 1 cm from the edge.

8. This is the clever bit! Turn the whole bag to the right side by pushing it through the hole you left in the bottom of the lining. Stitch up the gap folding the seam allowances inside.

9. Finally tuck the lining down into the inside of the bag and topstitch around the folded edge to keep it down and give a flat finish. You will need to stitch this quite slowly and carefully as you have a number of thicknesses to stitch through. Stitch a button on to the front of the bag to fasten the flap down.


No comments:
Post a Comment