Its half term this week so hope to have some time in my sewing room planning, pondering, designing, making and generally having a lovely time!
Saturday started with a walk along the Dee estuary followed by some liquid refreshment in one of our favourite dog-friendly pubs, then home to the warm for a spot of relaxing crochet.
I've been wanting to try out this ripple pattern from Lucy at Attic 24 for some time, so I decided to use up all my odd part-balls to make a rainbow pattern. It might be a bit of an ongoing project that I keep coming back to if I run out of yarn or get bored!
Sunday, 15 February 2015
Saturday, 14 February 2015
Pointed Petal Flower Tutorial
Here's my take on this pretty fabric flower.
Cut five circles of fabric. I've cut these petals 4 inches diameter.
Fold each petal into quarters.
Using double thread, work a running stitch along the raw edges joining all the petals together. The stitches don't need to be too small but must be even.
Pull up both ends of the tread as tightly as you can and knot securely together.
Attach a small circle of felt to the back of the flower with slip-stitches to cover the raw edges.
Stitch a button in the centre of the flower. I've layered two buttons together for a nicer effect.
Tip: Fill the little hole in the centre of the flower, where you knotted it, with pinch of wadding to prevent the back of the flower being drawn up when you sew through the holes in the button.
Labels:
broach,
fabric flower,
flower,
flowers,
gathered flower,
petal,
pin,
pntpetflow,
pointed
Square Petal Flower Tutorial
There are lots of tutorials online for fabric flowers but I always end up changing them. Here's my take on this square petal flower.
Cut 5 squares of fabric 3 inches x 3 inches.
Turn the edges of each square into the middle and press. Fold the two ends together (don't press this fold).
Using double thread, work a running stitch joining all five petals, close to their raw edges. The stitches don't have to be too small but must be even.
Pull up the two ends of the thread and knot together tightly.
Stitch a button securely into the centre of the flower. I've layered two buttons together here for a two-colour effect.
Slip-stitch a small circle of felt on the back of the flower to hide the raw edges. you can now add a pin or clasp to turn this pretty little flower into a broach or attach to a hair bobble. Or how about stitching a row of these around the neck of a jumper or t shirt?
Tuesday, 10 February 2015
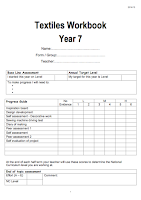
Year 7 Book Cover Project
This project is designed to introduce new Year 7 pupils to some of the core principles of Textiles Technology. They will master basic skills using the sewing machine and develop hand stitching techniques. The project also introduces safe working practices and an understanding of the design process.
Please feel free to download and adapt these resources for your own use.
Year 7 Book Cover Project
Click on the pictures to downloadPlease leave a comment if you download these files.
Year 8 Bug Case Project
This project met with great enthusiasm when I introduced it to my Year 8 classes. The original idea and some of the images of finished pupils work were taken from a presentation I found on an online Textiles teacher group. Unfortunately I can't find it again to credit the author.
Please feel free to download and adapt to suit your needs.
Year 8 Bug Case Project
Click on the images to download
Please leave a comment if you download the files.
Year 9 Bag Project
I'm putting together a collection of teaching resources I have used in school. Some I've designed myself, some adapted from other teachers' posts online.
Please feel free to download and adapt for your own use.
Year 9 Bag Project
To download, click on the picture
Labels:
bag project,
Key Stage 3,
resource,
textiles,
workbook,
Y9Bag,
Year 9
Sunday, 8 February 2015
Crochet Flowers
This week I've been playing around with crochet flowers for a possible give away at next year's Oxton Gardens. They're really simple to do. The rose design comes from Lucy's May Rose tutorial at Attic 24
Saturday, 7 February 2015
Subscribe to:
Posts (Atom)
Tag Cloud
appliqué
Armenian Lamb
attic 24
Authentic Spaghetti Carbonara
bacon
bacon and pea risotto
bag
bag project
bath mat
beef
Bolognese
book
book cover
broach
bug case
cheese
cheesy crust
chicken
Chilli Con Carne
cider
classes
colour
colourful
cooking tips
Cottage Pie
covered note book
Cowboy Bean Bake
craft
crochet
crunchy top
cube purse
draw string
draw string bag
Easy-Peasy Everyday Recipes
enchiladas
fabric flower
fat quarter
fish pie
flower
flowers
free-moyion embroidery
gathered flower
handbag
heart
hexagon
introduction
jelly roll
Key Stage 3
lasagne
Lemony prawn tagliatelle
love stitch
lunch bag
messenger bag
mince
msbg
passion for patchwork
pasta
patchwork
pattern
petal
pie
pin
plaiting
pntpetflow
pointed
purse
quilt
quilting
rainbow
recipes
resource
review
ripple
roses
sauce
sausages
scarf
sewing school
shoulder bag
signabag
signature
southerners scouse
Spanish Chicken
sqpetflow
starburst flower
stew
stocking
stylecraft special DK
t shirt yarn
table mats
tea cosy
textiles
Textiles project
tilda
tutorial
up-cycling
v stitch
vegetables
wall hanging
workbook
workshops
y7cover
y8bug
Y9Bag
Year 7
Year 8
Year 9


